Instruction covers RWD and AWD Q50's.
The following instructions are a walk through for installing front splash guards on a Infiniti Q50.
Special Thanks goes out to Mike at www.TunerzStore.com for his support of the project!
|
Parts Supplied By:
 |
|
Tools needed:Phillips screw driver, drill. 1/8" and 1/4" bits, jack, cleaner (mild soap, alcohol), lint free cloth (microfiber), painters or masking tape, pick or punch
|
|
|
The splash guards for this project were OEM Infiniti products ordered through Tunerzstore.com. They are pre-painted to match the body color, the guards are nicely wrapped in a protective cloth-like covering, and there is a notice included which points you to the installation guide, which you can view here: Infiniti Front Splash Guard Install Guide. The guide is a tad confusing at times.
Prior to physically applying the guards you will want to clean the area for proper adhesion |
|
Step 1. I started on the passenger side. First, start the car and turn the wheel all the way to the right so you can access the area. Use the jack and lift up the car so you can access the lower mounting locations. It's safer to use jack stands as you will have your head underneath the side.
|
|
Click for larger |
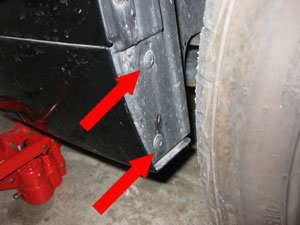
Step 2. Remove the two screws from the fender protector as shown and discard. Take this time to clean the surface mounting area where the tape will be applied to the body. You want to make sure old wax is removed as well as any debris.
|
|
Click for larger |
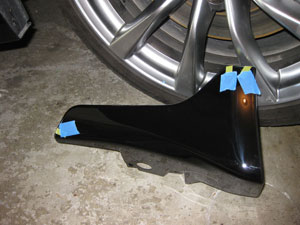
Step 3. On the back of the guard the tape sections have excess yellow film which will allow removal when mounted. These tabs need to be folded to the front and taped down.
|
|
Click for larger |
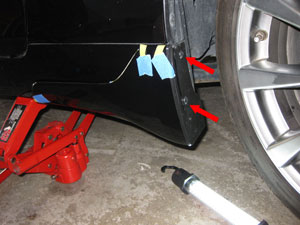
Step 4. Attach the guard to the fender protector using two supplied screws, do not fully tighten.
|
|
Click for larger
Click for larger |
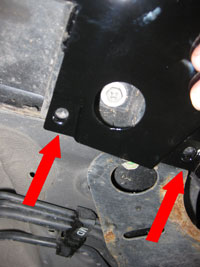
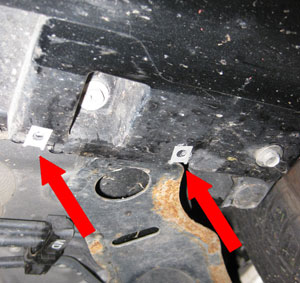
Step 5. Underneath the vehicle use a punch or a pick to mark the hole locations. Remove the guard again, use the 1/8" bit to drill a pilot hole and the 1/4" to finish (I skipped the 1/8" and used a 1/4" brad point style bit). Install the two spring nuts as shown in the second image. |
|
Click for larger
Click for larger |
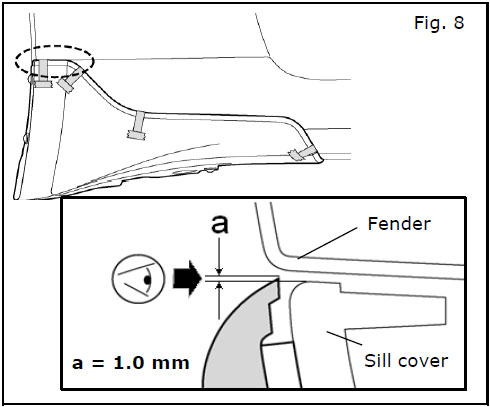
Step 6. Reinstall the guard with all four screws. Do not completely tighten. Align the top to be 1mm above the fender/sill line as shown in the image to the left. The Infiniti instructions have you tighten the screws at this point (34~39 in-lb) but I found that the yellow film can bind and tear, which requires undoing it all again. Thus, leaving the screws slightly less than finger tight, pull the top yellow tape backing film from the top and lightly press to the fender, maintaining the 1mm overlap. Proceed to remove the remaining film sections.
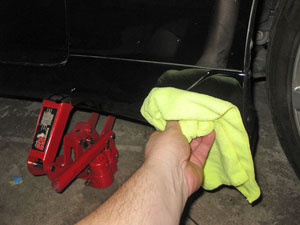
Using the microfiber towel, press and rub the sections with appx 15lb of force to help adhere the tape to the body. Finish tightening the screws.
Repeat for the other side.
|
|
Time and Difficulty. Total time for installing the front guards was appx 1 hour as I was taking pictures and not in any rush. On a scale of 1-5 I would rate this install a 1.5 (easy).
|
|
Disclaimer: The author will not be held responsible nor held liable for any damages due to these instructions. Anyone following these directions are doing so at their own risk. This Documentation may not be distributed without the authors consent.
|


